Chatbot with Angular CLI and Api.ai
In this tutorial we will create a Chatbot as a Single Page Application using Angular and Api.ai.
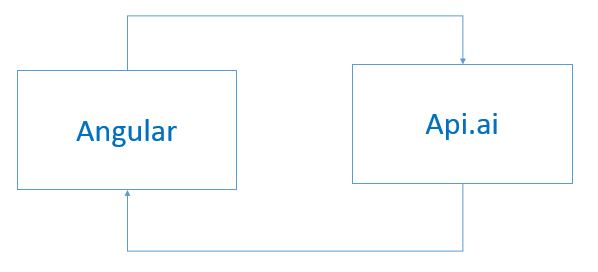
Figure 1 - Architecture of our SPA
Angular CLI
Angular CLI is an amazing tool which helps us easily build scalable Angular Applications. That’s why it is a good idea to use it for our Chatbot app.
In order to set up our environment we need to go in our console and type:
npm install -g @angular/cli *
/* If we already don’t have it installed */
… and create new project with a chatbot component
ng new chatbot-example
cd chatbot-example
ng g component chatbot
After a successful installation we will proceed to create a simple User Interface for our project. For this purpose we are going to use Angular Forms.
In the file app.module.ts we need to import the FormsModule.
!!Note that we import HttpModule as well as we are going to need it later on.
import { BrowserModule } from '@angular/platform-browser';
import { NgModule } from '@angular/core';
import { FormsModule }   from '@angular/forms';
import { HttpModule } from '@angular/http';

import { AppComponent } from './app.component';
import { ChatbotComponent } from './chatbot/chatbot.component';


@NgModule({
  declarations: [
    AppComponent,
    ChatbotComponent
  ],
  imports: [
    BrowserModule,
    FormsModule,
    HttpModule
  ],
  providers: [],
  bootstrap: [AppComponent]
})
export class AppModule { }
The next step would be to create our html form in chatbot.component.html:
<div class="chat">
  <form #questions="ngForm">
      <div class="conversation" #conversation>
          <div class="bot-message">

          </div>
      </div>
    <div class ="response">
      <input autocomplete="off" [(ngModel)]="newQuestion" name="newQuestion" placeholder="Question" autofocus>
      <button class="ask" type="submit" (click)="askQuestion(questions.value)">Ask me</button>
    </div>
  </form>
</div>
!! Note: All the css will be posted at the end of the blog post.
Api.ai Integration
Api.ai is a natural language processing framework which can help us develop human-computer interactions - e.g. chatbots!
Now that we have a simple UI, it is time to integrate Api.ai into our application.
- Create Api.ai agent - Instructions
- Install Api.ai JavaScript SDK -
npm install [email protected] - Create Angular service
Angular service
We use Angular CLI command to create service:
ng g service apiai
In apiai.service.ts we create a service which makes a http request to our Api.ai agent.
import { Injectable } from '@angular/core';
import { Http, Headers, Response } from '@angular/http';
import { Observable } from 'rxjs/Observable';
import {ApiAiClient} from "api-ai-javascript";

@Injectable()
export class ApiaiService  {
  token: string = 'Your Client Access Token';
	constructor(private http: Http) {}

	send(question: string) {
		return new ApiAiClient({accessToken: this.token})
          	   .textRequest(question)
               .then((response) => {
					return response;
				})
              .catch((error) => {/* Do something in case of error */})
	}
}
We shouldn’t forget to add our service in the providers as it is shown below.
In file app.module.ts:
import { BrowserModule } from '@angular/platform-browser';
import { NgModule } from '@angular/core';
import { FormsModule }   from '@angular/forms';
import { HttpModule } from '@angular/http';

import { AppComponent } from './app.component';
import { ChatbotComponent } from './chatbot/chatbot.component';
import { ApiaiService } from './apiai.service';

@NgModule({
  declarations: [
    AppComponent,
    ChatbotComponent
  ],
  imports: [
    BrowserModule,
    FormsModule,
    HttpModule
  ],
  providers: [ApiaiService],
  bootstrap: [AppComponent]
})
export class AppModule { }
… and back into our chatbot.component.ts we need to inject our Service:
export class ChatbotComponent implements OnInit {

  constructor(private chat: ApiaiService) { };
  welcomeText: string;

  question: any;
  res: any;
  result: any;
  newQuestion: string;
  listOfQuestions: string[] = [];
  listOfResults: string[] = [];

  ngOnInit() {
    this.welcomeText = "Hi there"
  }

  askQuestion(value: any) {
    value.newQuestion = value.newQuestion.trim();
    if (value.newQuestion) {
      this.listOfQuestions.push(this.newQuestion);
      this.newQuestion = '';

      this.chat.send(value.newQuestion)
        .then((res) => {
          this.result = res;
          this.result = this.result.result.fulfillment.speech;
          this.listOfResults.push(this.result);
        });
    }
  }
}
The final version of our chatbot.component.html is shown below:
<div class="chat">
  <div class="header">Chatbot</div>
  <form #questions="ngForm">
    <div class="conversation" #conversation>
      <div class="bot-message">

      </div>
      <div *ngFor="let question of listOfQuestions; let k = index; let l = last" class="section">
        <div class="msg">
          <div *ngIf="question" class="user-message"></div>
        </div>

        <div class="bot-message">
          <div *ngIf='listOfResults[k]' class="showText">
            <div *ngIf='listOfResults[k]' class="msg">

            </div>
          </div>
        </div>
      </div>
    </div>
    <div class="response">
      <input autocomplete="off" [(ngModel)]="newQuestion" name="newQuestion" placeholder="Question" autofocus>
      <button class="ask" type="submit" (click)="askQuestion(questions.value)">Ask me</button>
    </div>
  </form>
</div>
The only thing which is left is to train our agent in Api.ai. We can enable the Small Talk Conversation and build our own intents.
At the end we will have a simple web chat:
If you find this article useful you can follow me on twitter.
As promised, here is chatbot.component.css:
.chat {
    float: left;
    margin: 20px;
    border: 1px solid black;
    width: 400px;
    height: 100%;
    padding-bottom: 40px;
}
.chat form {
    padding:20px;
}
.conversation {
    float: left;
    width: 100%;
    height: 300px;
}

.response {
    float: left;
    width: 100%;
}
.bot-message {
    float: left;
    padding: 20px;
    background-color: lightblue;
    border: 1px solid lightblue;
    border-radius: 10%;
}
.user-message {
    float: right;
    padding: 20px;
    background-color: darkseagreen;
    border: 1px solid darkseagreen;
    border-radius: 10%;
}
.msg {
    width: 100%;
    float: left;
}

.header{
    background-color: cadetblue;
    color:white;
    padding: 20px;
    text-align: center;
}
input {
    width: 280px;
}