Animated Shopping List with Angular
In this post we’ll develop a shopping list and enhance its look with animations!
Creating the list itself
First let’s create simple form where we can add shopping items.
Assuming that you are already aware of the basic Angular concepts, we will implement one component called ListComponent, having class with two methods - one to add items
in the list and one for removing items.
import { Component } from '@angular/core';

@Component({
  moduleId: module.id,
  selector: 'sd-list',
  template: 'list.component.html',
  styleUrls: ['list.component.css']
})
export class ListComponent {

  newItem: string = '';
  items: any[] = [];

  addItem(): boolean {
    if(this.newItem) {
      this.items.push(this.newItem);
    }
    this.newItem = '';
    return false;
  }
  removeItem(value): boolean {
    var index = this.items.indexOf(value);
    this.items.splice(index, 1);
    return false;
  }

}
For now there is nothing special in our template as well:
<h2>Shopping list:</h2>
<form (submit)="addItem()">
  <input [(ngModel)]="newItem" autocomplete="off" name="newItem" placeholder="Add products">
  <button type="submit">Add</button>
</form>

<ul>
  <li *ngFor="let item of items" (click)="removeItem(item)"></li>
</ul>
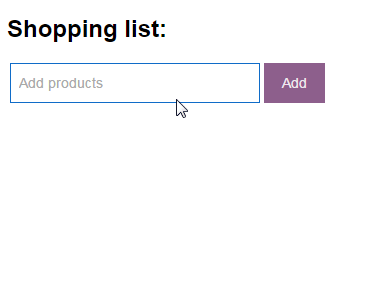
At the moment our list looks like this:
Let’s make it looks better!
Animations in Angular
We will take few moments to take a look at the most important things we need to know while working with Angular Animations.
We have already imported the Component, now we should also import some animation-specific functions:
import { Component, trigger, state, style, transition, animate } from '@angular/core';
Trigger function
trigger is Angular animation-specific function, with main purpose to trigger a state change of the elements.
We need to invoke it in our Component decorator, right under the Animation section and also bind it to our template.
Our component metadata would look like this:
@Component({
  moduleId: module.id,
  selector: 'sd-list',
  template: 'list.component.html',
  styleUrls: ['list.component.css'],
  animations: [
      trigger('smoothchange', [
          .........
      ])
    ]
})
Our template:
<ul>
  <li [@smoothchange]="item.state" *ngFor="let item of items" (click)="removeItem(item)"></li>
</ul>
State function
The state function helps us define what is the current state of our element.
If we don’t specifically declare what would be the current state of the element, the * (default state) is triggered.
The void state is reserved word which allows Angular to understand when the element is not part of the application anymore.
We can also create our own states names - they are simply strings.
After we decide what are going to be the states of our element, we should define them within the trigger function.
The state function can have two arguments, the first is the name of the state and the second is the styles which the element should have while being in this state.
@Component({
  moduleId: module.id,
  selector: 'sd-list',
  template: 'list.component.html',
  styleUrls: ['list.component.css'],
  animations: [
      trigger('smoothchange', [
        state('void', style({transform: 'translateX(0)'}))
      ])
    ]
})
Transition function
The transition function defines how the elements would change while going from one state through the other.
Animate function
The animate function declares the animation that needs to be performed and for how long the required style would be displayed.
If style is not specified then the styles from the destination state will be collected and used.
Shopping list
In order to create the flying in and flying out effect of our shopping items we can use the ccs transform function:
animations: [
      trigger('smoothchange', [
        state('void', style({transform: 'translateX(0)'})),
        transition('void => *', [
          style({transform: 'translateX(-100%)'}),
          animate(300)
        ]),
        transition('* => void', [
        animate(300, style({transform: 'translateX(100%)'}))
        ])
      ])
    ]
There are a lot of fun things we can do with Animations, so stay tuned for more articles!
If you like this, follow me on twitter!